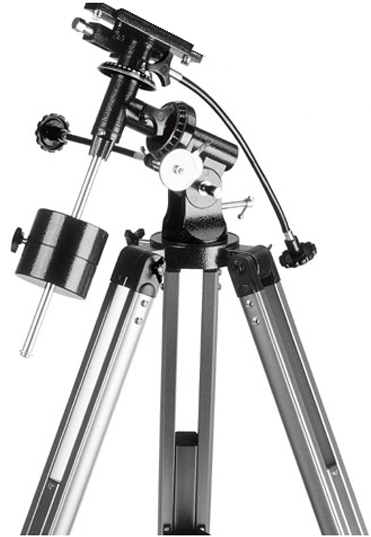
 As an amateur astrophile, I can count on very simple tools – such as a 130/900 Skywatcher Newtonian telescope on an EQ2 mount – that sometimes can seem obscure to a total newbie (or to an occasional observer). So, I decided to write this simple vademecum to read everytime the official manual isn’t available for a reason or another.
Important premise: I do assume that very basic notions like as Altitude/Azimuth and Right Ascension/Declination coordinate systems are acquired. If not, I propose to close any gaps by a quick google search (or by reading wikies like this). Moreover, the following instructions are written for the Northern Hemisphere, but are valid for the Southern too.
Advice: use a low power eyepiece during the alignment session.
Pointing the telescope to any kind of celestial object is obviously divided in two phases:
- Polar Alignment;
- Using the setting circles to point the objects.
Polar Alignment
- Look on a map or a GPS your latitude and write it down.
- Make sure that the mount is perfectly horizontal by the help of a level; if it is not, work on the length of the tripod.
- Loosen the latch and adjust the altitude until the angle marked on the disc does correspond to the latitude; tighten the latch.
- Loosen the declination knob, and then rotate the telescope until the pointer is at 90-degrees; tighten the knob.
- Loosen the azimuth rotation knob, and rotate the mount until the white line between the letters R and A are oriented roughly toward Polaris (this star is very near to the true North Celestial Pole); tighten the knob.
- Improve the alignment by playing on the azimuth and altitude knobs and by trying to hit Polaris with the finderscope.
- If the alignment is correct, you can track Polaris simply by using the right ascension slow-motion cable.
Using the setting circles to point the objects
There are two ways to watch celestial objects: one is to learn the constellations and use the finder to point them by view, and the other is to consult sky maps or special software (such as the free and open source Stellarium) to know the coordinates in right ascension and declination of the object you want to observe. In any case, if the polar alignment is successful, you will not have to work in altitude and azimuth again (otherwise why use an equatorial mount? :-P).
We explore the latter way.
- Note that the right ascension circle is divided in hours, from 1 to 24; the higher set of numbers regards the Northern Hemisphere, while the lower one applies to the Southern Hemisphere.
- First point to a very bright object, such as Vega or Arcturus.
- Write down the right ascension coordinate of this object; for example, assume that Arcturus has a right ascension coordinate of 14h 15m.
- Loosen the right ascension and declination knobs until Arcturus is seen by the telescope field of view; then, tighten the knobs.
- Rotate the right ascension setting disc until it reads 14h 15m.
- Job done! Now you can use right ascension and declination circles to find any kind of object!
- Example: assume that you want to find the Butterfly Cluster (also known as M6); its RA and DEC coordinates are 17h 15m, and -32° 13′.
- Loosen the declination knob until the pin is (approximatively) on -32° 13′; tighten the knob.
- Loosen the right ascension knob until you read 17h 40m, without moving the setting circle.
- Use the flexible cables in order to make an accurate alignment.
Hope that this guide can be useful to someone!
1 comment