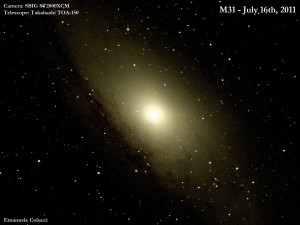
 As an amateur astronomer, I’ve always been attracted by astrophotography; but, because of light pollution and a poor equipment (just a 130/900 newtonian Skywatcher!), I never went very far from the mere but still exciting visual observation. Now, with remote telescope services available on Internet (like Global Rent a Scope), I just gained the ability to access to darker skies, better equipment and, most of all, to astrophotography.
The first obstacle to face, after the shot is acquired, is the peculiar format used to store image data in astronomy: the Flexible Image Transport System or FITS. It isn’t the standard in graphics, so it has to be manipulated and exported by using the appropriate tool – in this case Fits Liberator – before to feed the picture to the usual image editing tools like as Adobe Photoshop or Gimp.
Here is a little tutorial to create a raster RGB picture from data stored in .fit file through Fits Liberator and Adobe Photoshop. Hope this vademecum could be useful to someone other than me! 😀 I attached the fits file relative to the picture you can see here on the left, it could be interesting compare mine and yours M31!
- Open the .fit file with Fits Liberator.
- Set Channels to 8-bit.
- Click on Auto Scaling.
- Try different Stretch functions, and then adjust black level and white level by using the appropriate sliders in the histogram window (under the preview), that shows the bightness distribution of pixels in the image. The aim is to obtain a good contrast.
- Finally, save as tiff the three planes that compose the image: plane 1 is for red channel; plane 2 for green; plane 3 for blue.
- Open the three .tif files just generated in Photoshop.
- Put blue.tif at the lower level; then green and finally red on the top.
- Set the image mode to RGB/8 bits per channel.
- For each layer, set the Blend Mode to Screen.
- Select the blue layer; select New Adjustment Layer > Levels (check Use Previous Layer to Create Clipping Mask); then, again, select the blue layer, add a New Adjustment Layer > Curves (check Use Previous Layer to Create Clipping Mask); and finally, add a New Adjustment Layer > Hue/Saturation (check Use Previous Layer to Create Clipping Mask).
- Levels and Curves are useful for fine tuning of the picture; if the only aim is to obtain an RGB image, it’s possible to avoid using them.
- With Hue/Saturation we give colour to this layer: check Colorize, and then set the Hue to 240, the Saturation to 100 and the Lightness to -50 (these parameters correspond to blue in PS).
- Repeat 10 to 12 for green and red layers; set Hue respectively to 120 and 0.
- Flip Vertical the image.
- Job done! We just reached a starting point for more fine tuning.